Import Accounts
If you have a long list of accounts, rather than creating them manually one-by-one, you can utilize SalesShaper import feature to import your accounts.
You can read about the import guidelines below,
or view the steps on how to import accounts on SalesShaper.
Note that only Sales Manager and Assistant Sales Manager have access to the import feature.
Import Guidelines
Before you proceed to import your accounts, please download our csv template for accounts import- accounts_sample.csv and make sure to map these fields when you import.
| Field/Column Name | Mandatory? | Description |
|---|---|---|
| Account Name | Yes | The company or organization name of account |
| Reg No | No | The business registration number of account |
| GST No | No | The Goods and Services Tax (GST) registration number of account |
| Phone | No | The company phone number of account |
| Fax | No | The fax number of account |
| Website | No | The website of account |
| Street | No | The street in account’s address |
| City | No | The city in account’s address |
| State | No | The state in account’s address |
| ZIP | No | The zip or postal code in account’s address |
| Country | No | The country in account’s address |
| Customer Background | No | The background of account |
| Contact First Name 1 | No | The first name of account’s default contact |
| Contact Last Name 1 | Yes | The last name of account’s default contact |
| Contact Title 1 | No | The title of account’s default contact |
| Contact Phone 1 | No | The phone number of account’s default contact |
| Contact Mobile 1 | No | The mobile number of account’s default contact |
| Contact Email 1 | No | The email address of account’s default contact |
| Contact First Name N* | No | The first name of account’s other contact |
| Contact Last Name N* | No | The last name of account’s other contact |
| Contact Title N* | No | The title of account’s other contact |
| Contact Phone N* | No | The phone number of account’s other contact |
| Contact Mobile N* | No | The mobile number of account’s other contact |
| Contact Email N* | No | The email address of account’s other contact |
Note:
N* can be 2, 3, or 4. This means you can import up to four contacts per account.
You can leave blank for columns that are not mandatory.
Import Accounts to SalesShaper
To import accounts:
- Login to your account via web portal.
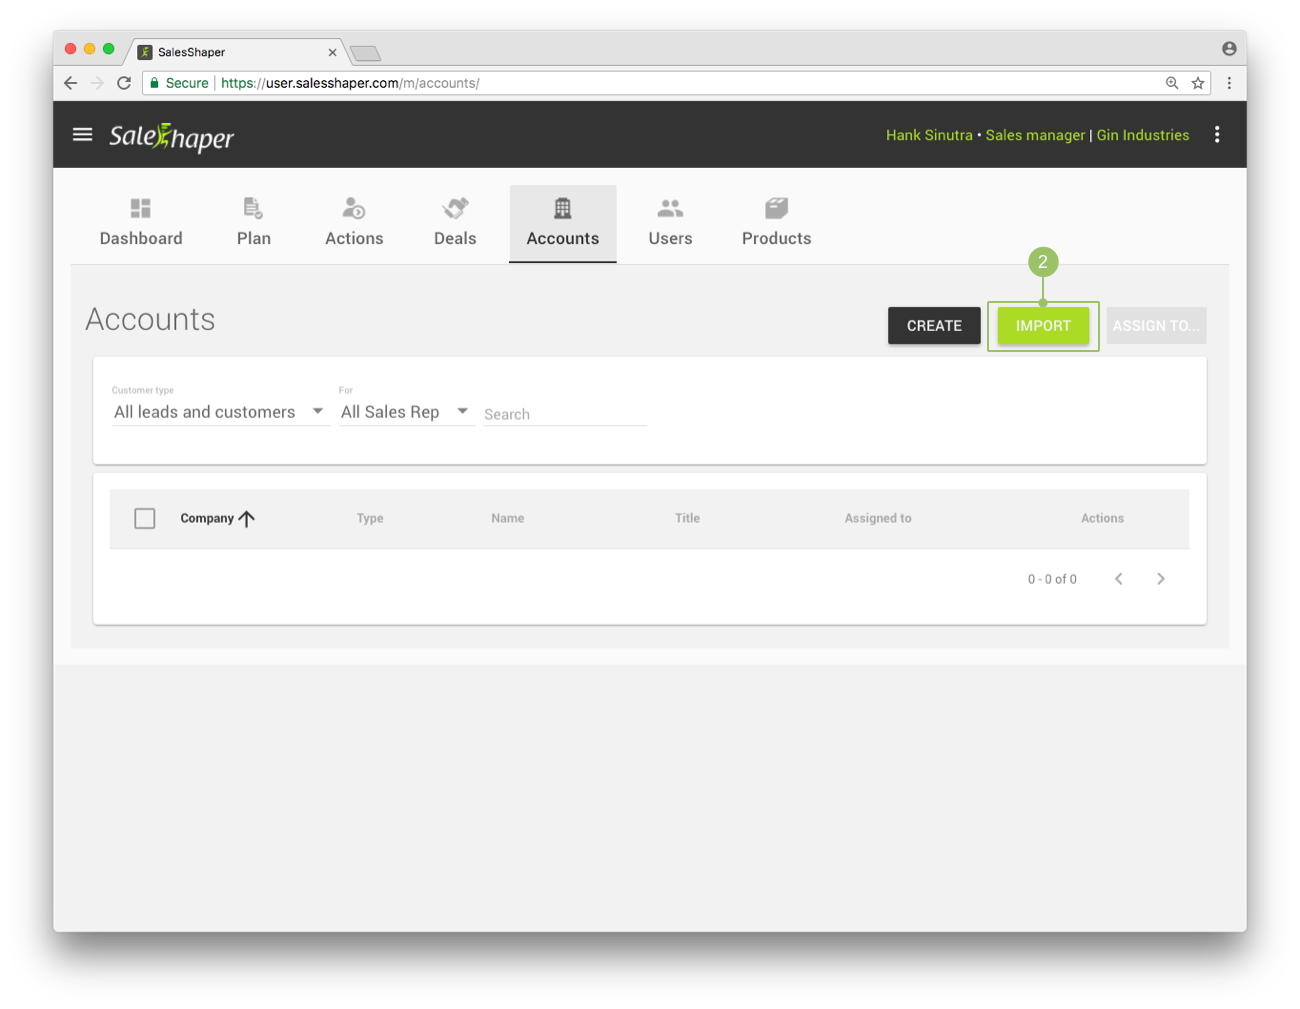
- Select ACCOUNTS from the menu panel, and click IMPORT.
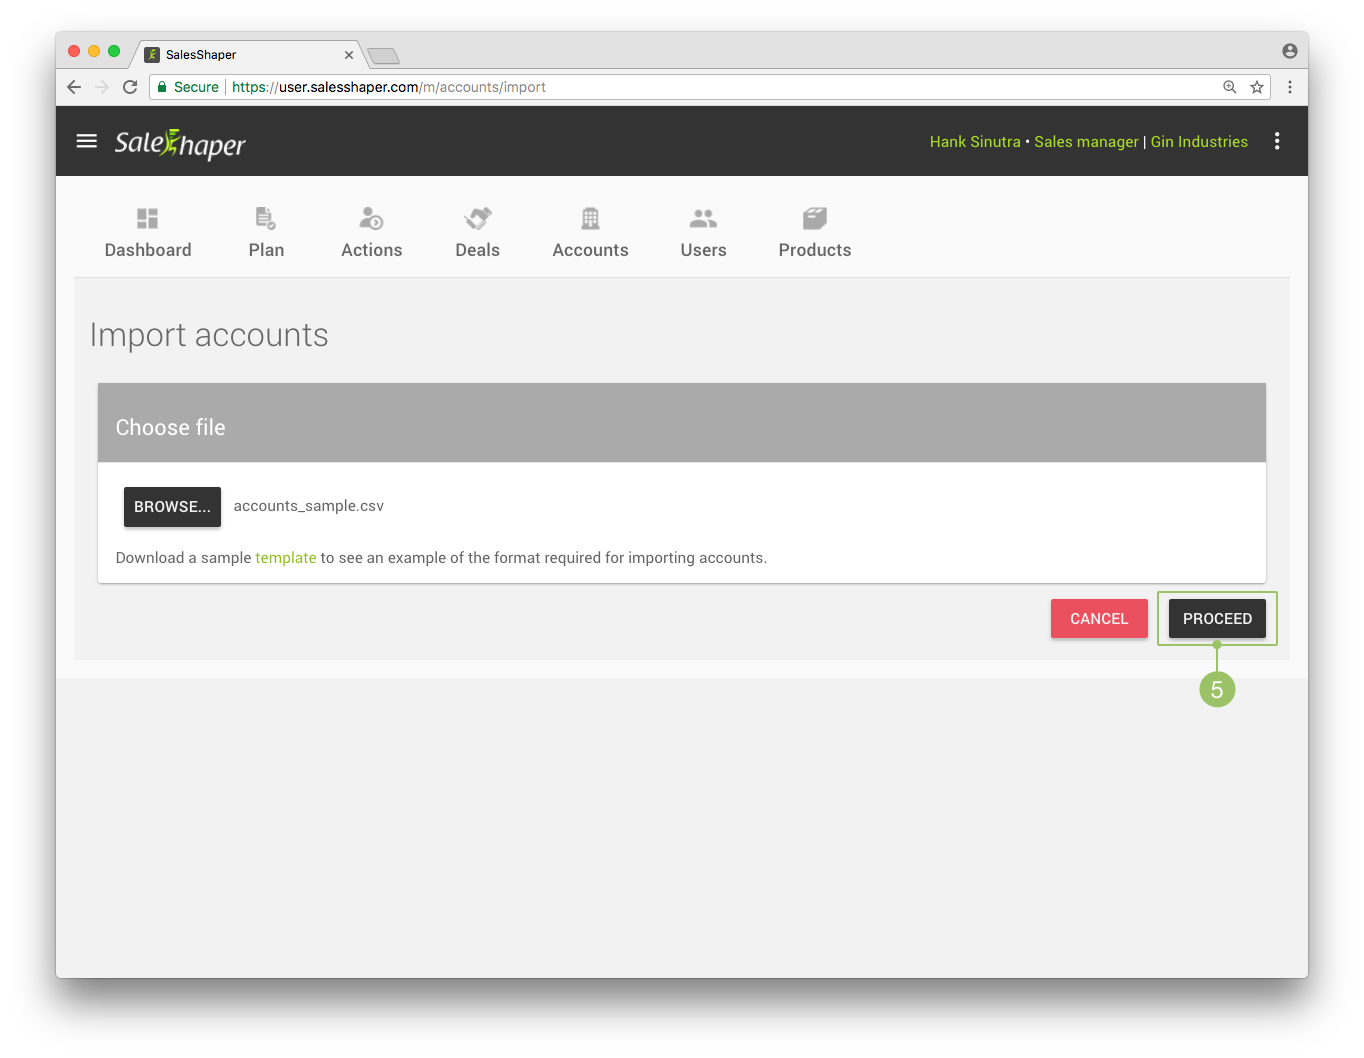
- Click BROWSE....

- Select the source file.
- Click PROCEED.
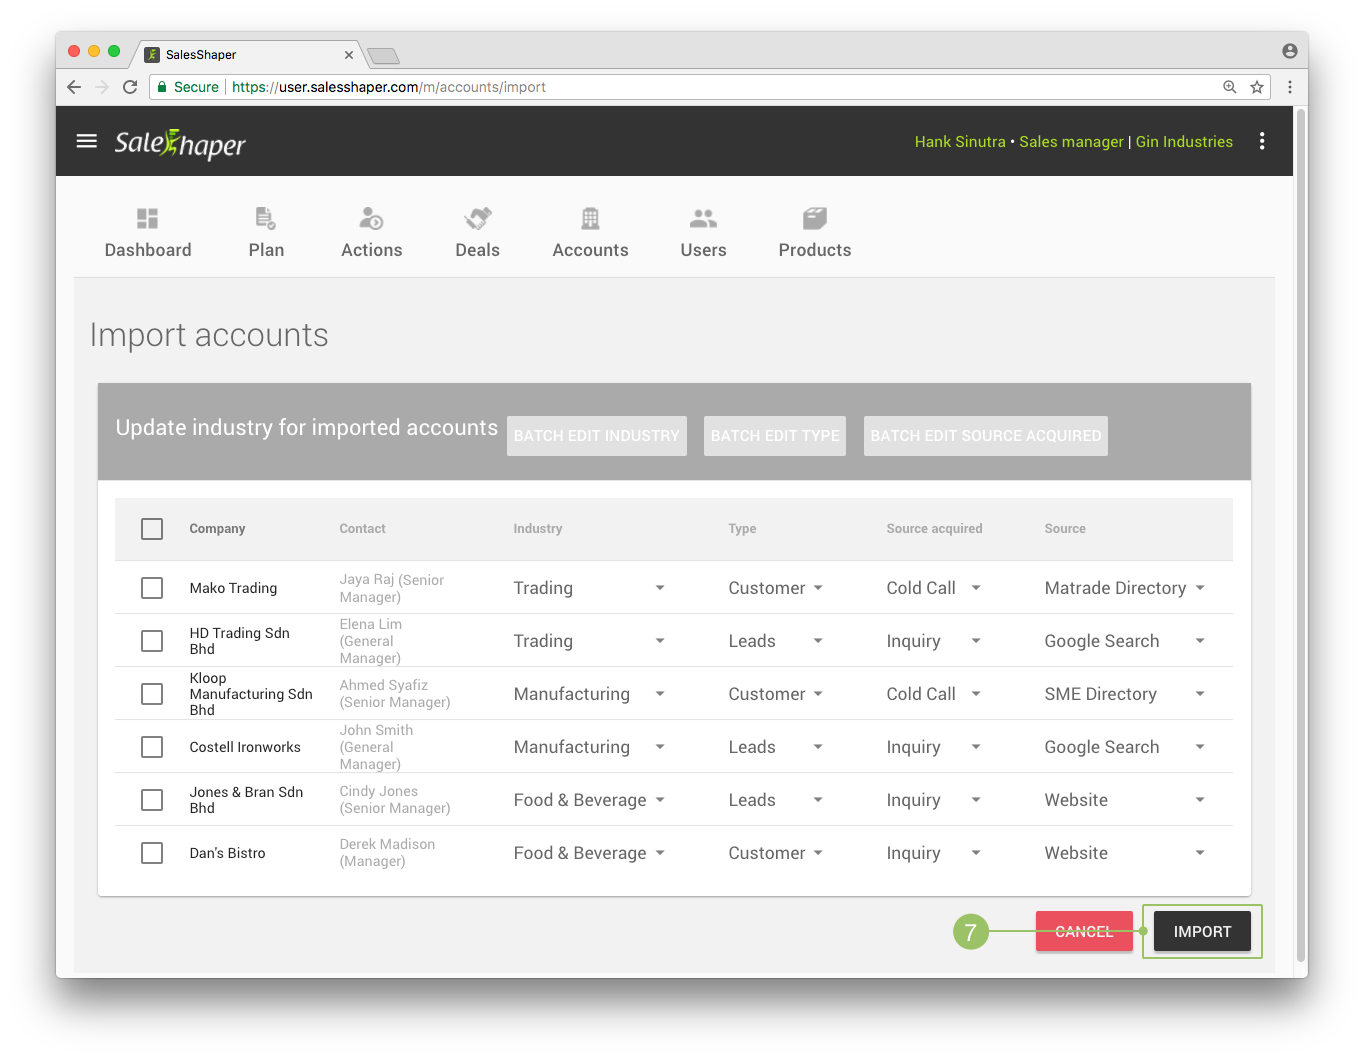
- On the next screen, you are required to provide the (i) industry, the (ii) account type, the (iii) acquired method and (iv) source for each of the account.
These fields are compulsory- be sure all fields have been selected with an option before proceeding to import.
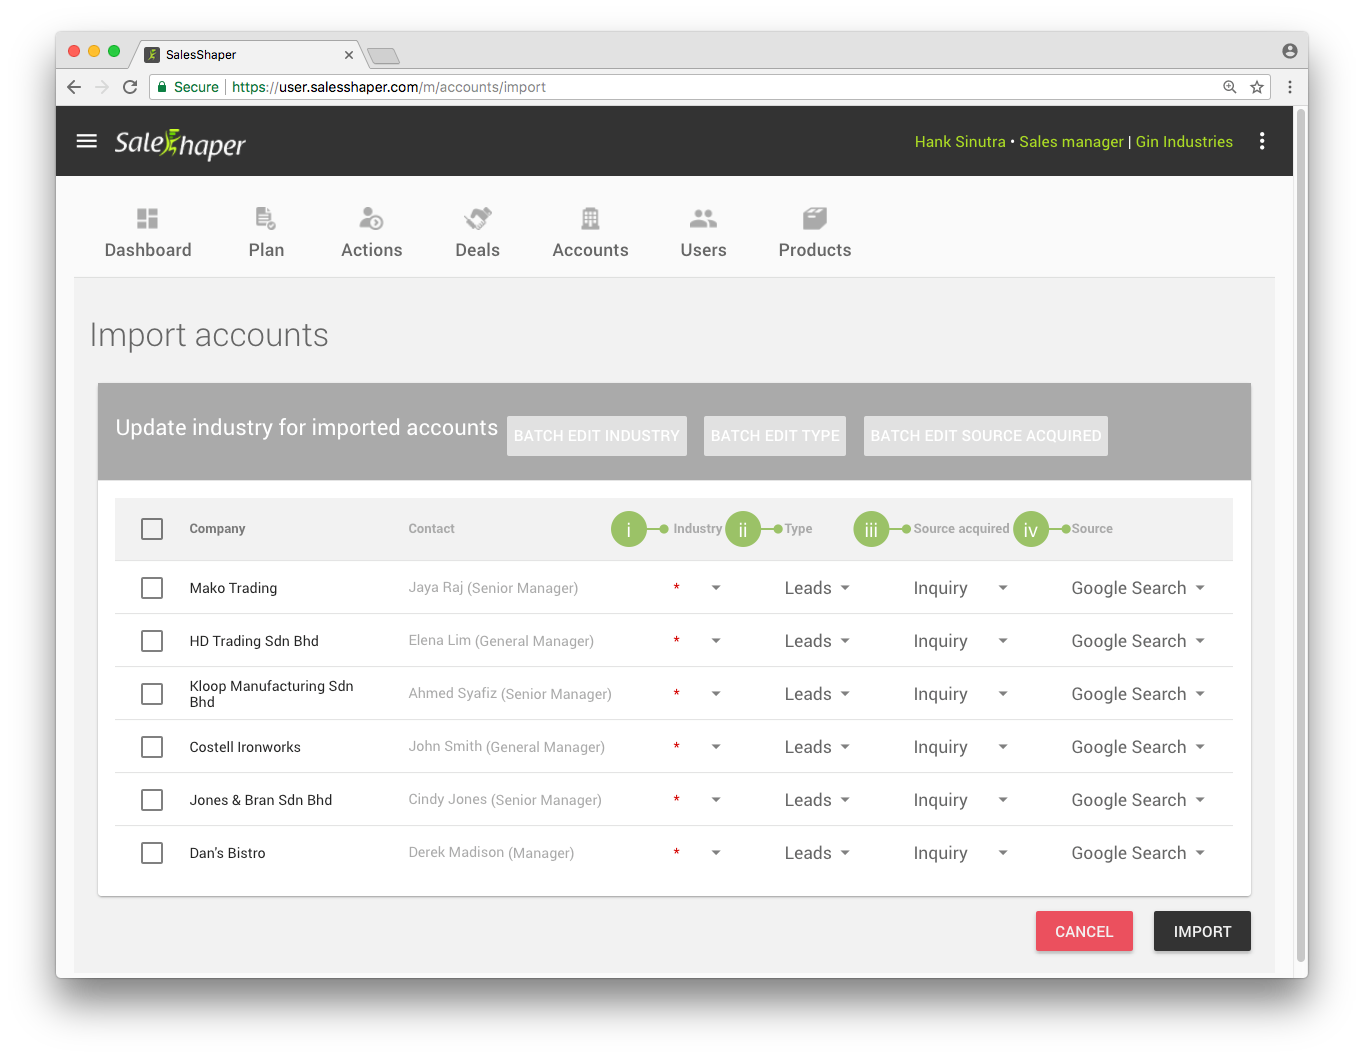
Note:
By default, all imported accounts are regarded as Lead, with Inquiry and Google Search selected as the source acquired and source. You can change these options accordingly.
If you want to select the same industry for multiple accounts, select them by checking the checkboxes on their specific rows.
Then, click BATCH EDIT INDUSTRY.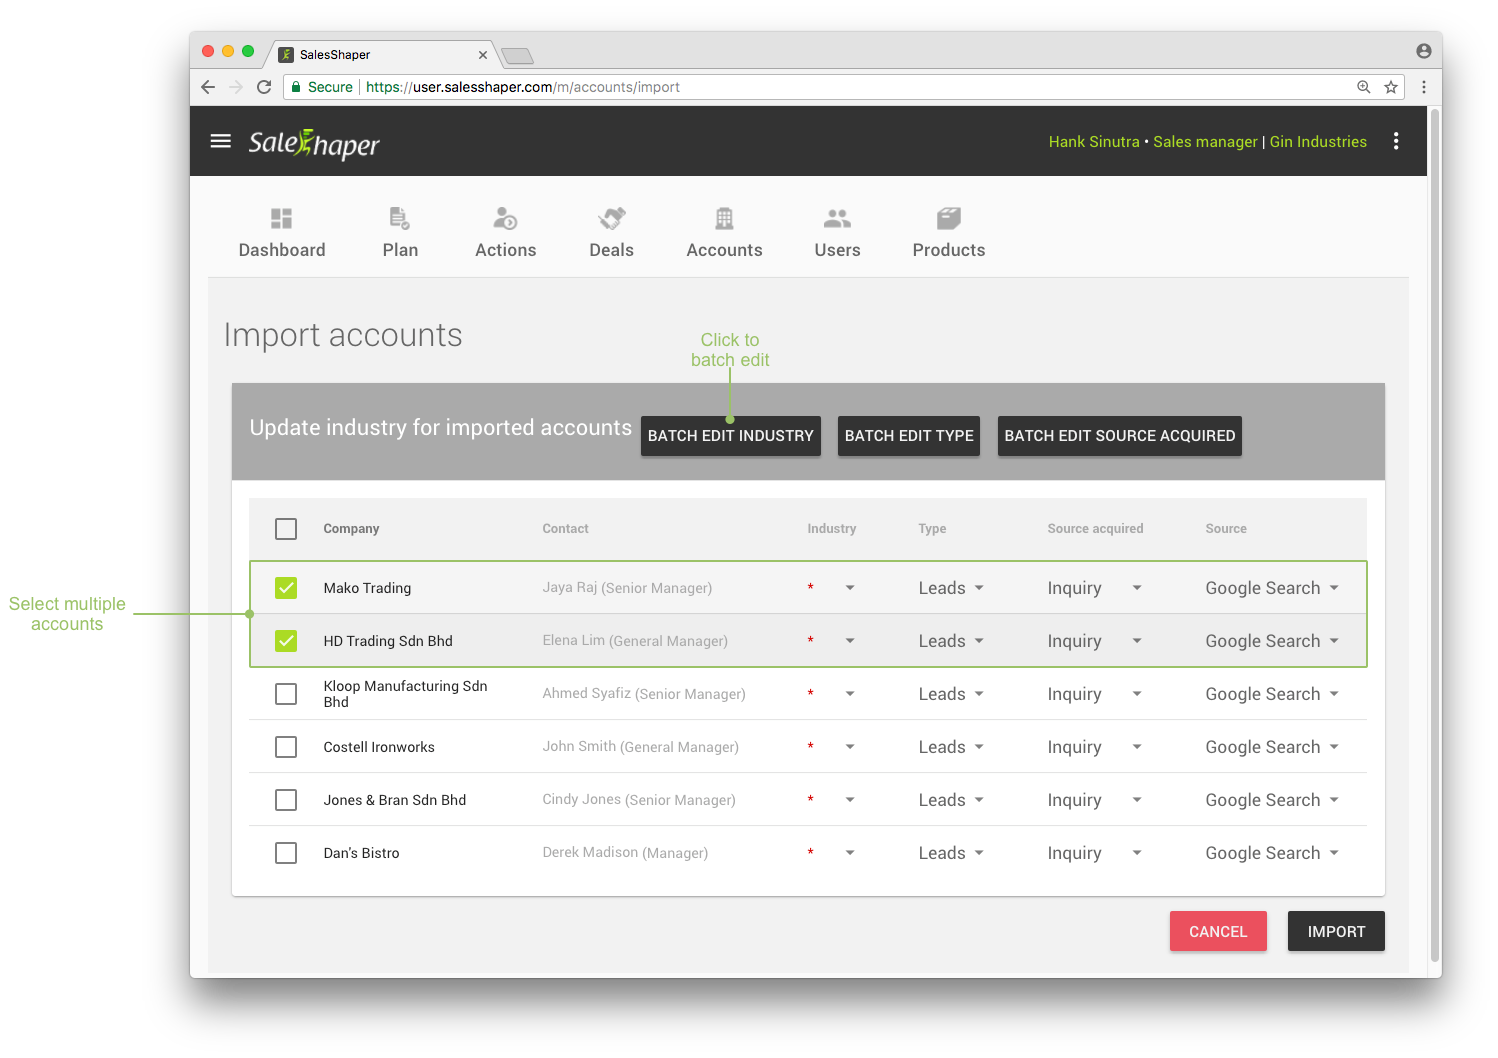
Select an industry from the pop-up box, and click OK.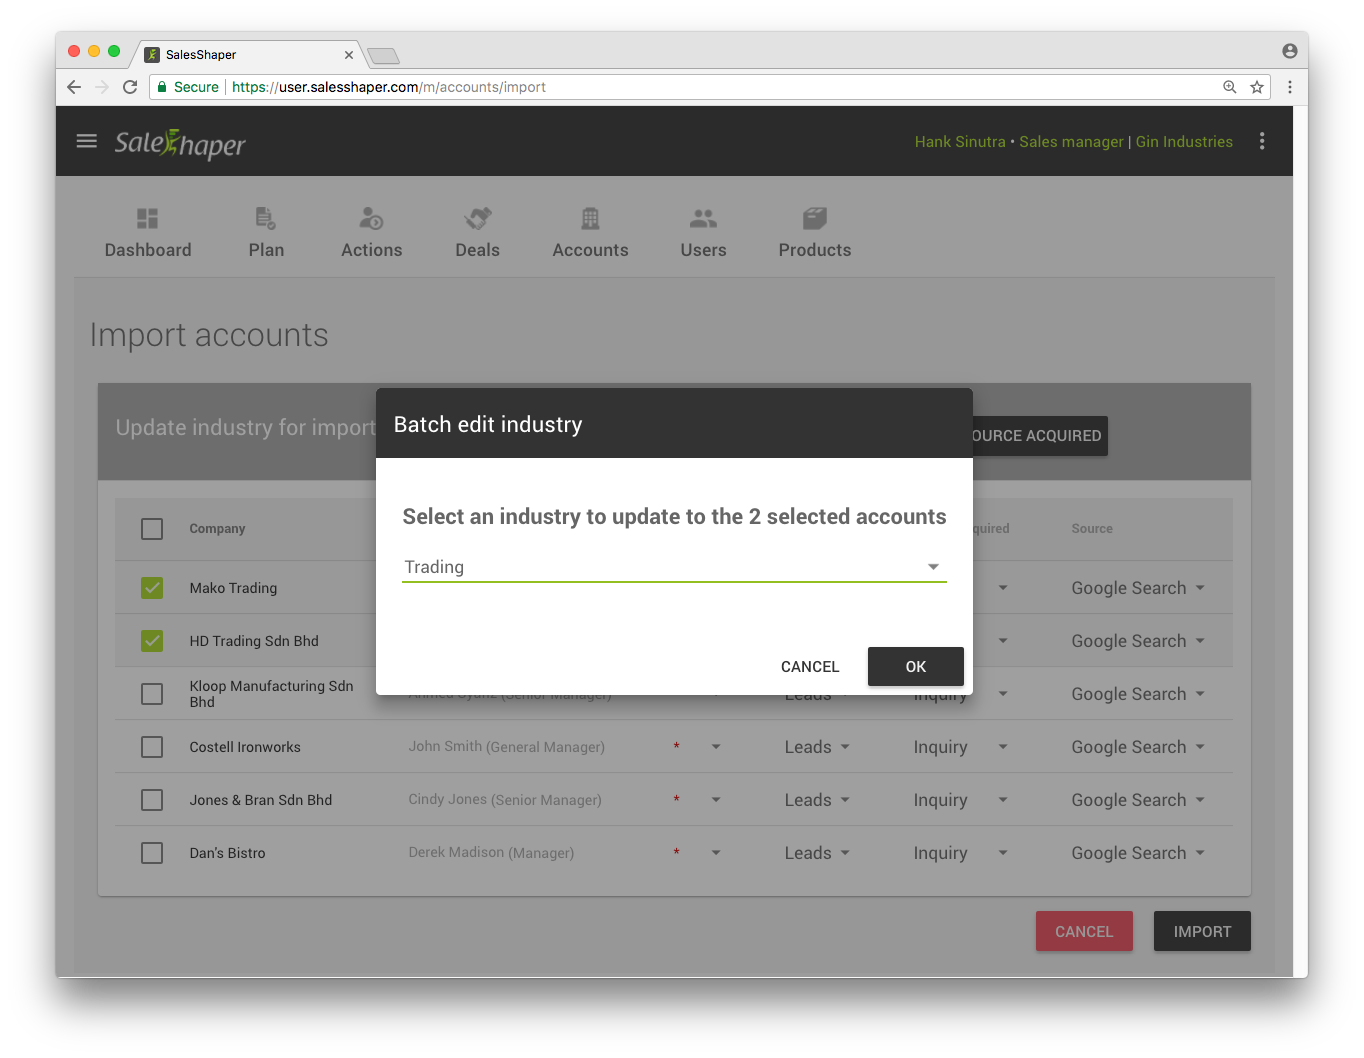 You’ll see that the selected accounts have been updated with the selected industry.
You can do the same for account types by clicking the BATCH EDIT TYPE button, and the source acquired method by clicking
BATCH EDIT SOURCE ACQUIRED.
You’ll see that the selected accounts have been updated with the selected industry.
You can do the same for account types by clicking the BATCH EDIT TYPE button, and the source acquired method by clicking
BATCH EDIT SOURCE ACQUIRED.
- Once you have selected the industry, account type, source acquired method and source for all accounts, click IMPORT.
The accounts will be created automatically in the list. You can now assign them to your sales representatives.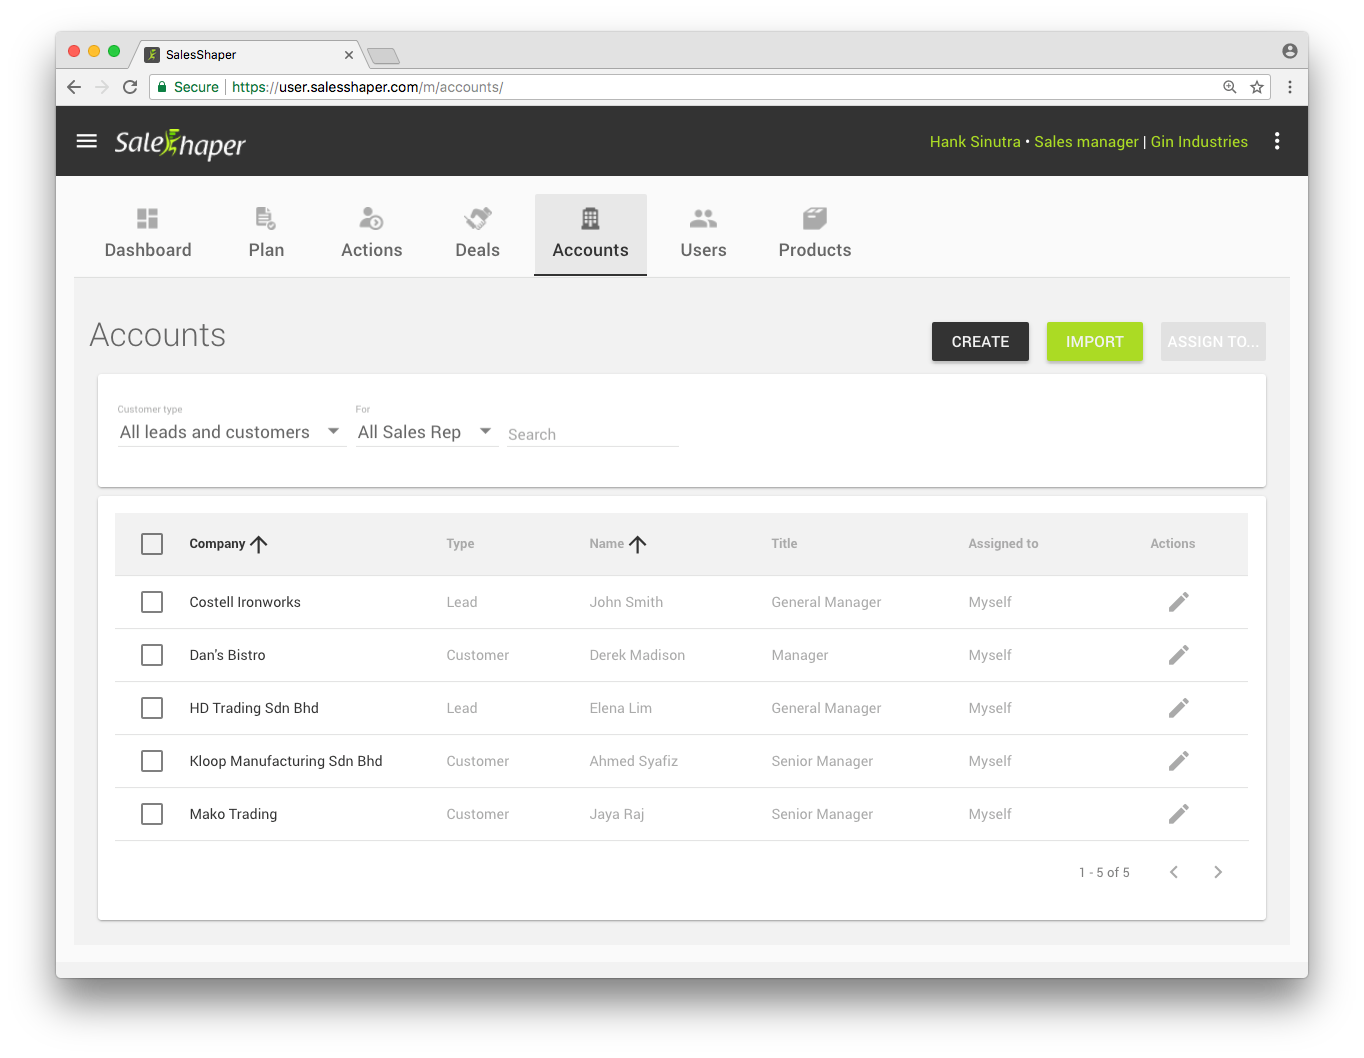
Next Topic: Assign or Transfer Accounts to Other Sales Reps ⋙
Did not find an answer to your question? Write to us at support@salesshaper.com