Adding a Next Action
In SalesShaper, when you complete a follow-up action or an appointment action, the system will prompt you to add a next action.
Otherwise, when you look through a deal, you will realize that there is no current action for the deal and you want to add a new action for the deal.
To add a next action on SalesShaper:
- Launch SalesShaper and go to Deal.
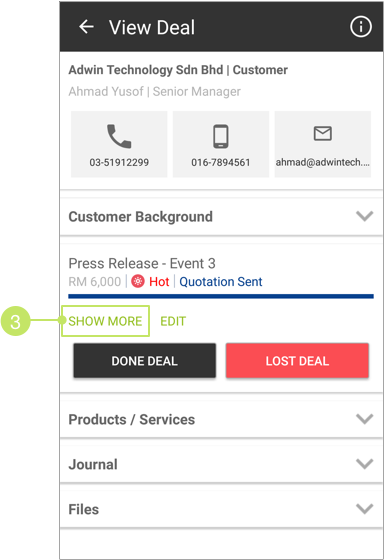
- From the deal list, click on the deal that has no current action.
- Click the SHOW MORE button.
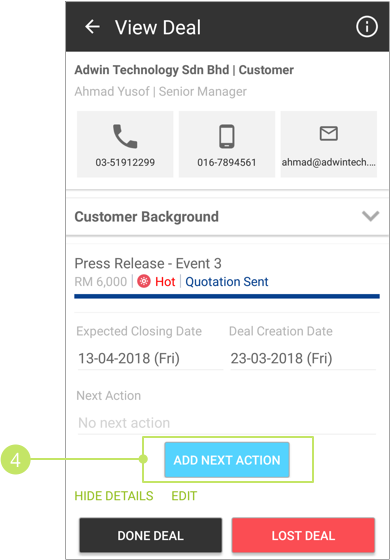
- Under the 'Next Action' section, tap on ADD NEXT ACTION.
- At the 'Add next action' page, enter the action name into the "Action to take" field.
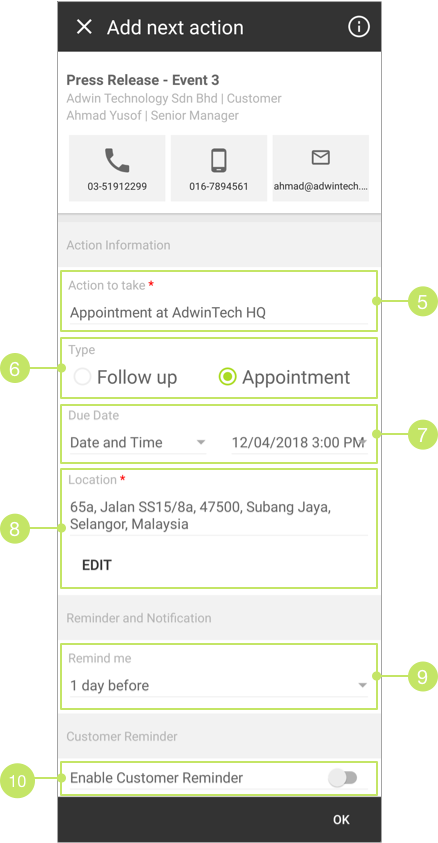
- Select the action 'Type'.
- Then, select a due date for the action. If it is an urgent action, select "ASAP" as the due date.
- If you have chosen 'Appointment' for 'Type', then you can click EDIT to change the address if necessary.
- Next, select a reminder option for the action so that you will be notified when it is time for you to complete the action. For example, if you set "5 minutes before" as the reminder option, you’ll receive a notification about the action five minutes before the action dues.
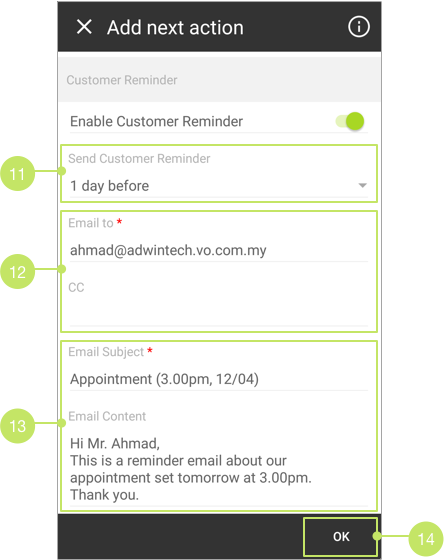
- If you wish to send a reminder email about the action to the Account’s contacts, enable the "Enable Customer Reminder" option. You can skip these steps and jump to step 14 if you do not wish to send any email reminder.
- You can select when the reminder email will be sent on the "Send Customer Reminder" selection.
- Enter the recipient email addresses into "Email to" and "CC" fields. By default, the email address of the Account’s default contact will be prefilled in the "Email to" field.
- Enter the email subject and content on the last two fields.
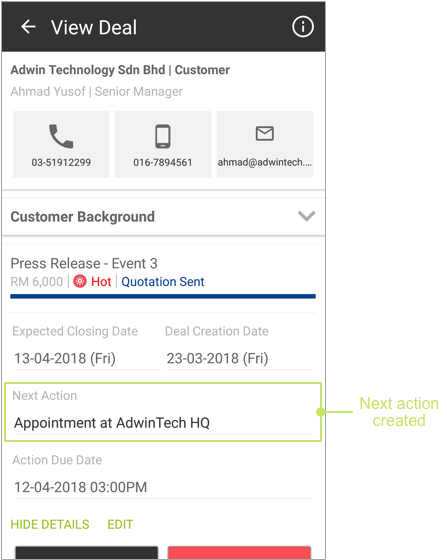
- Click OK to create your new action.
Did not find an answer to your question? Write to us at support@salesshaper.com